Milky Wreath Bread
Hello everybody, I hope you are having an amazing day today. Today, I'm gonna show you how to prepare a distinctive dish, Milky Wreath Bread. One of my favorites. This time, I'm gonna make it a bit tasty. This will be really delicious.
Milky Wreath Bread is one of the most well liked of current trending foods on earth. It's appreciated by millions every day. It is easy, it's quick, it tastes delicious. They are fine and they look wonderful. Milky Wreath Bread is something which I have loved my whole life.
Many things affect the quality of taste from Milky Wreath Bread, starting from the type of ingredients, then the selection of fresh ingredients, the ability to cut dishes to how to make and serve them. Don't worry if you want to prepare Milky Wreath Bread delicious at home, because if you already know the trick then this dish can be used as an extraordinary special treat.
To get started with this recipe, we must prepare a few components. You can have Milky Wreath Bread using 8 ingredients and 14 steps. Here is how you cook that.
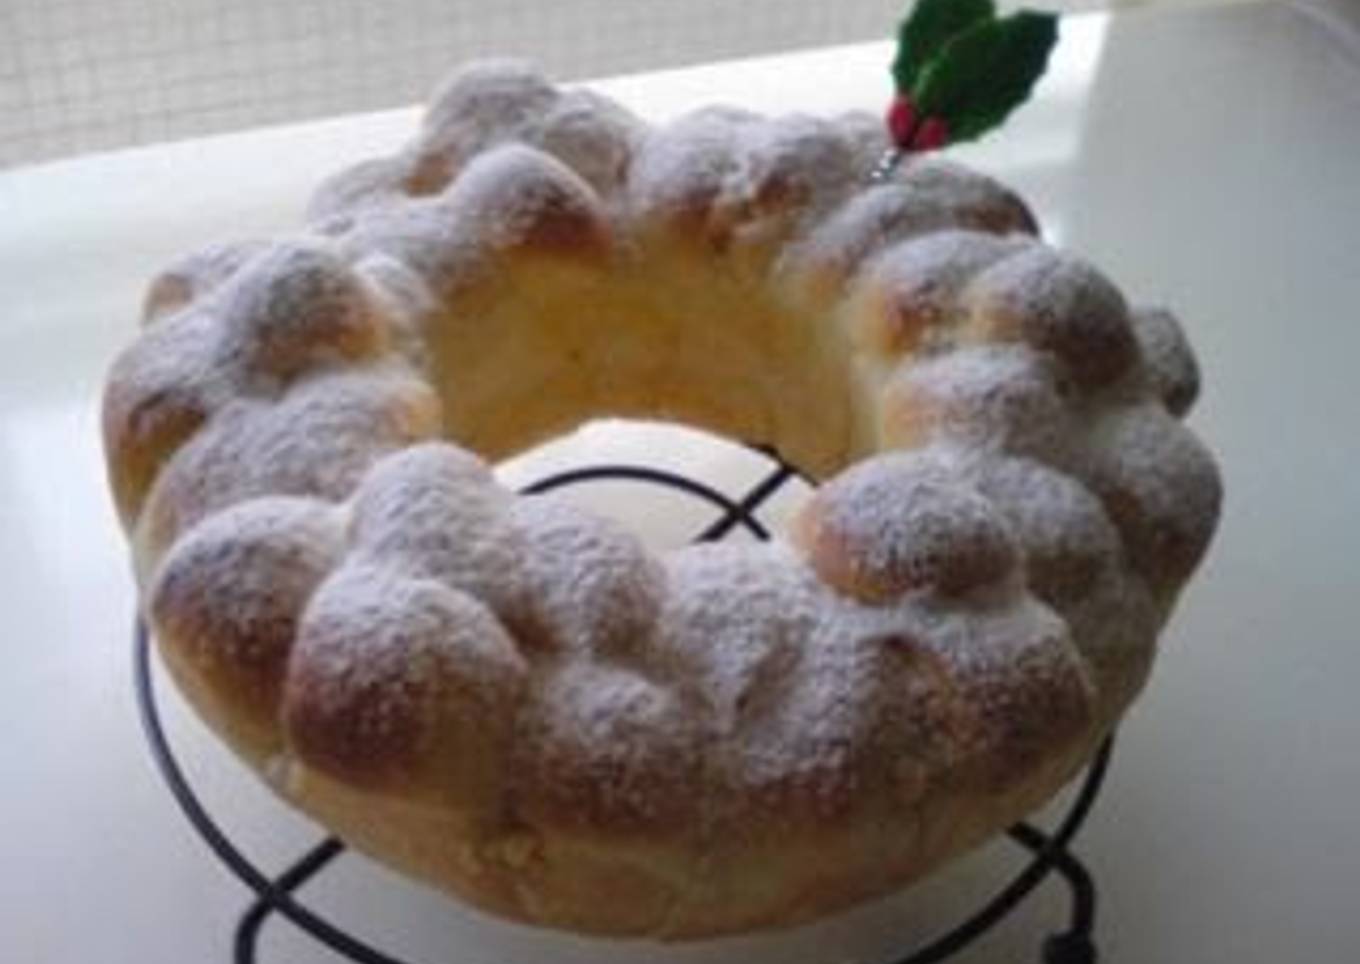
I wanted to make a cute snow white Christmas risse-like fluffy bread, so this was born.
It has a gentle flavor, and is perfect as a gift!
Please bake this according to your oven at home.
This recipe uses white chocolate chips, but it is also delicious with normal chocolate chips or give it an adult flavor with rum raisins . Make it baby friendly by removing the chocolate chips or/and powdered sugar . Recipe by satoclover
Ingredients and spices that need to be Take to make Milky Wreath Bread:
- 150 grams Bread flour (Domestically produced)
- 1 tsp Instant dry yeast
- 1 1/2 tbsp Sugar (caster)
- 110 ml Milk
- 1/3 tsp Salt
- 15 grams Butter
- 2 heaping tablespoons Chocolate chips (your favorite kind)
- 1 tbsp Powdered sugar
Steps to make to make Milky Wreath Bread
- Mix half of the flour, yeast, sugar, and milk with a spatula.

- Add the remaining flour, salt, and butter to Step 1, and mix in the center of the bowl until the powder disappears.

- Place Step 2 on top of a board, and knead while stretching it against a flat surface.

- Knead well.

- Knead with both hands once it rolls into a lump so that it doesn't dry out.

- After it has become smooth from kneading, wrap in plastic wrap, cover with a wet towel, and let it rise once at 40°C for 25~35 minutes.

- Poke the dough with a floured finger, divide into 6 equal portions if it is ok, and roll into smooth balls. Let sit for 10 minutes.

- Shape it. Lay the dough on a flat surface, the closed edges on top, press out the gas by hand, and sprinkle chocolate chips.

- Roll it up from the front, and stick the dough edges together firmly at the overlap.

- Stretch out Step 9 flatly by hand, and cut 5 notches with a bench scraper.

- Roll up from the left, and firmly secure the ends of the dough together.

- Coat the mold well with butter, place the dough from Step 11 with the seam facing the center into the mold, cover with plastic wrap, then with a wet cloth, and ferment again for 20~30 minutes.

- When dough has fermented all the way to the top of the mold, bake for 14~18 minutes in an oven preheated to 180C.

- Let cool, sprinkle powdered sugar sifted through a tea strainer, and it is done.

As your experience and self-confidence expands, you will certainly locate that you have a lot more all-natural control over your diet plan and adjust your diet to your individual preferences over time. Whether you want to offer a dish that makes use of fewer or more active ingredients or is a little bit more or less zesty, you can make straightforward modifications to attain this objective. Simply put, begin making your dishes promptly. When it comes to basic food preparation skills for beginners you do not require to discover them however only if you grasp some basic food preparation methods.
This isn't a full overview to quick and also very easy lunch recipes however its great something to chew on. Hopefully this will certainly get your creative juices moving so you can prepare scrumptious dishes for your family without doing a lot of square meals on your journey.
So that is going to wrap this up with this special food Steps to Prepare Speedy Milky Wreath Bread. Thanks so much for reading. I am confident that you can make this at home. There's gonna be interesting food at home recipes coming up. Remember to save this page on your browser, and share it to your loved ones, colleague and friends. Thanks again for reading. Go on get cooking!


Comments
Post a Comment